|
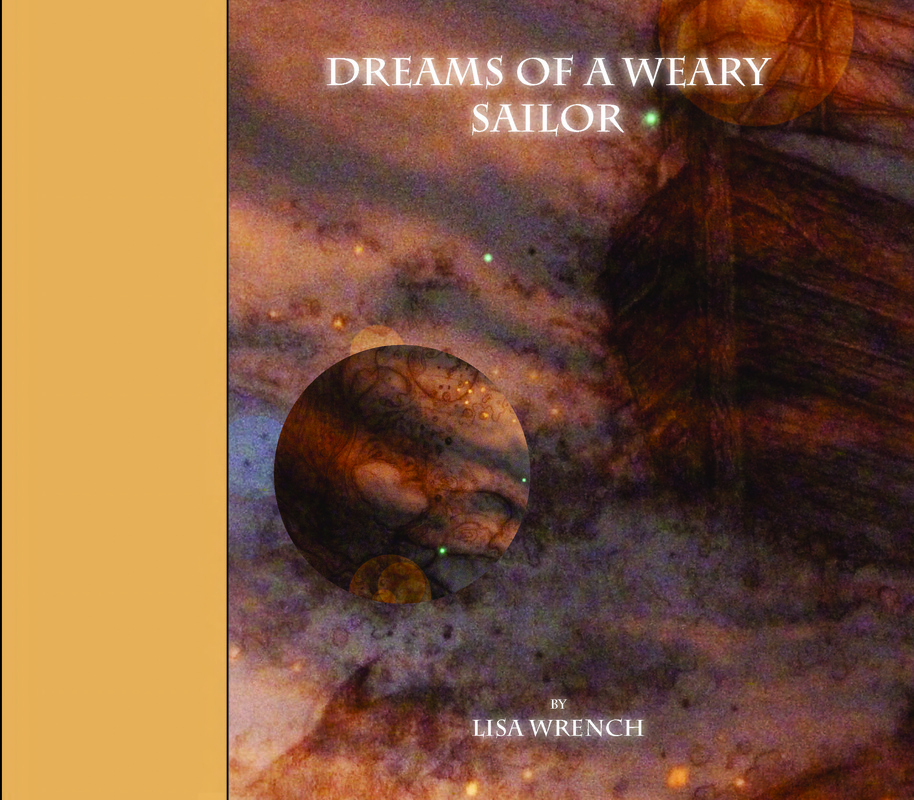
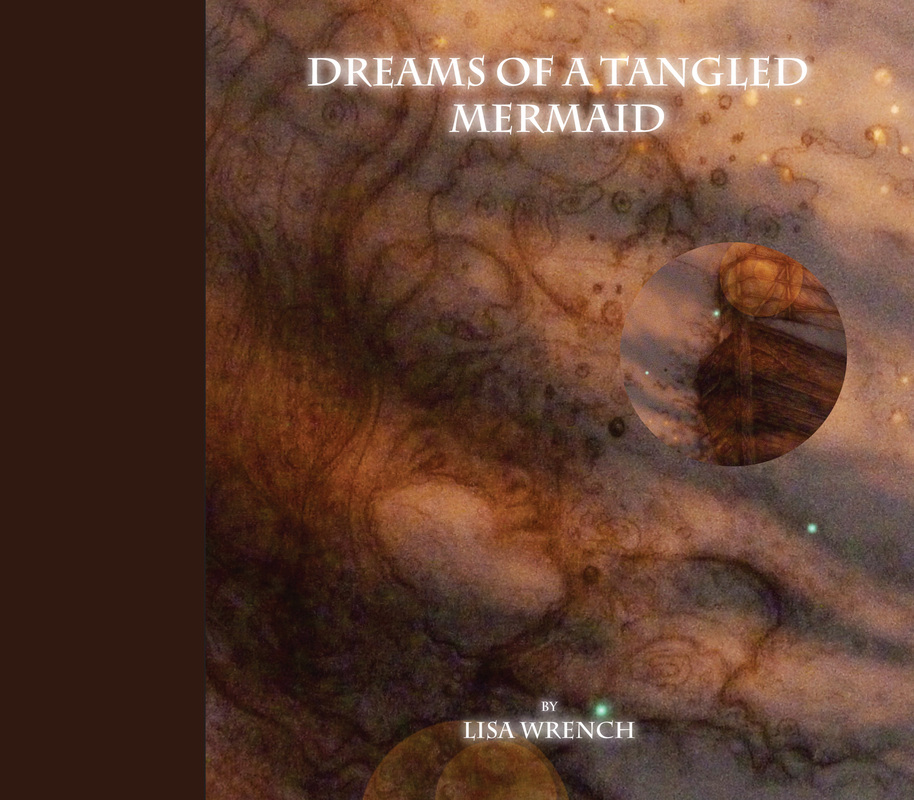
So here I have my cover designs, laid out in indesign, complete with a rough idea of what the book cloth will look like down the left hand side. The circles will be 'cut-outs' to an image beneath the main one, which echos the image on the other side of the back-to-back format. Yes, I know it sounds complicated, but it isn't really.
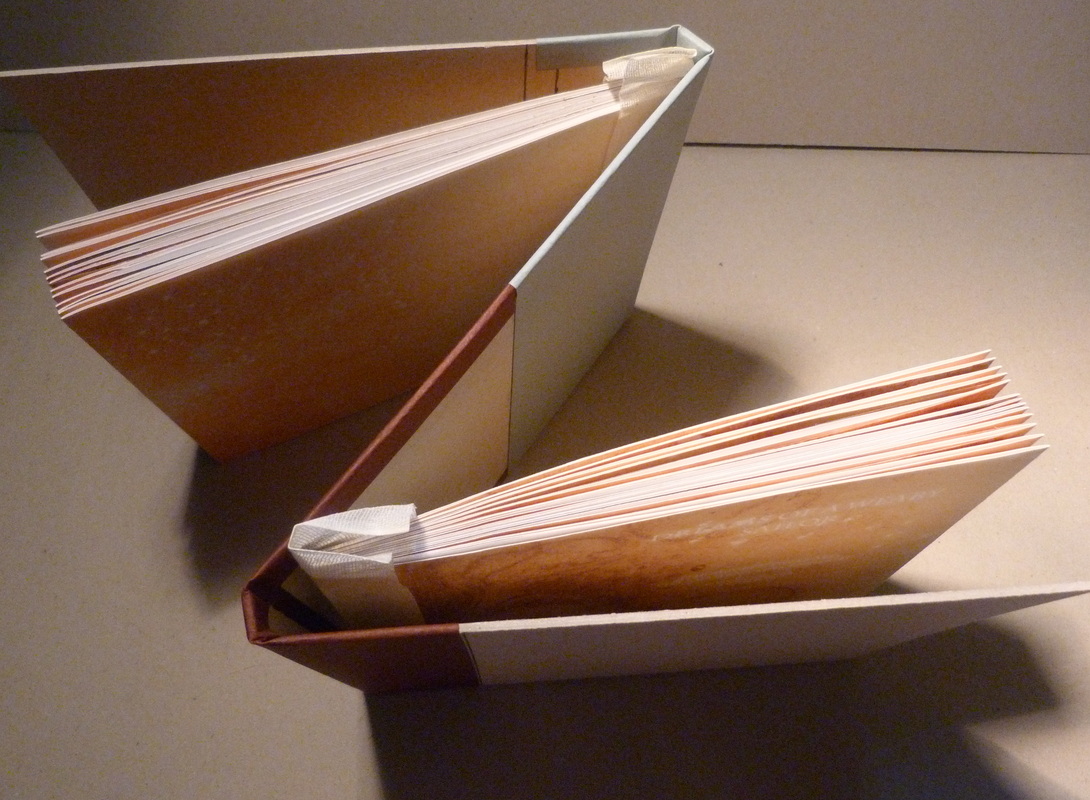
I've chosen to keep my covers dark and dramatic, rather than use the gold which is predominant inside the book. I feel that this gives a nice contrast and it also echos the title page images which are in the more delicate gold. Also, I just like the way this looks as the cover and the atmosphere it suggests. I'm really excited now to soon have these finished and to be able to share the finished story in its completed form. This week I had a fantastic bookbinding session with Catrin Morgan, one of my tutors. It has long been my intention to bind 'Siren Vs Sailor' (working title!) as a back-to-back book, a device intended to highlight the duel-narrative of the story, but the construction of the book has given me a lot of problems which needed resolving along the way (difficulties with tracing paper, how to print, using french folds, reinforcing the perfect binding etc etc ... the list goes on ...) So, by the time it came to thinking about the cover, I was almost ready to bind it as two separate books and present them in a slipcase, which seemed infinitely easier, given that I have also chosen to use a hardback binding (you know, just because I wanted to give myself yet another challenge!)
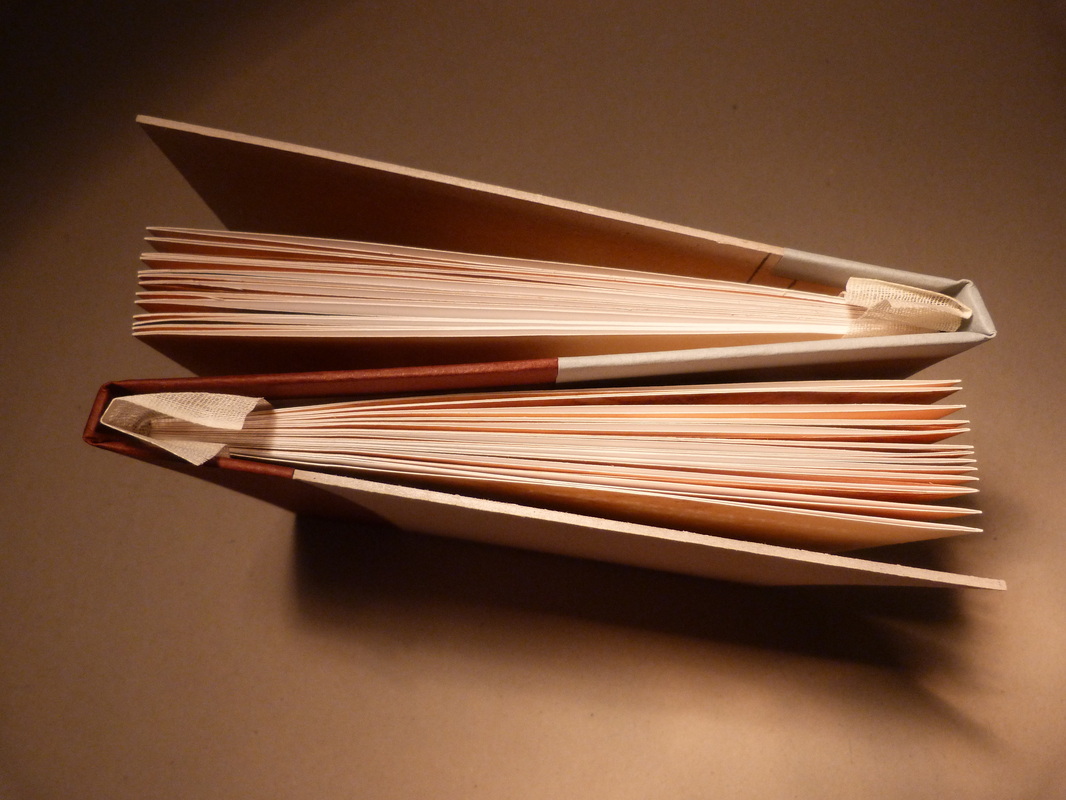
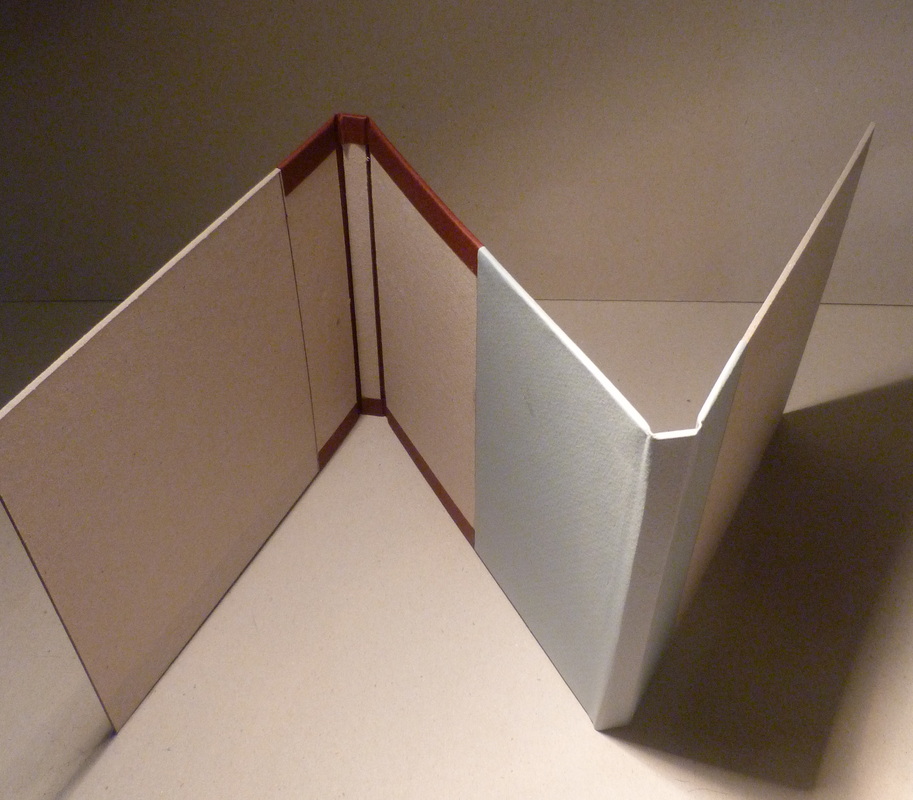
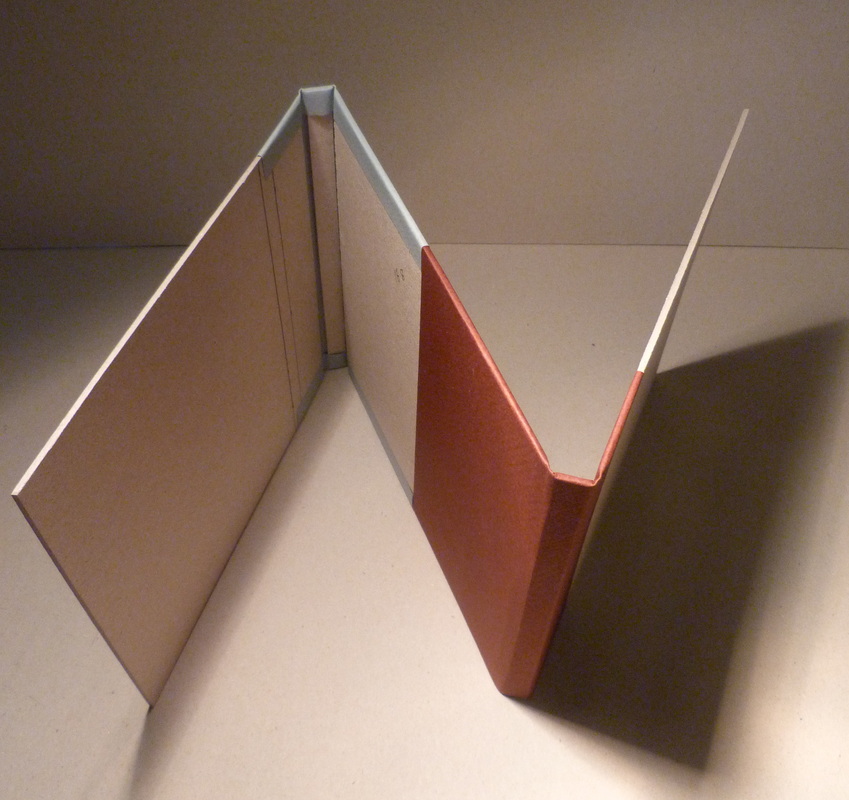
Anyway, for the purposes of the session, I created a dummy book with which to experiment and with Catrin's help, figured out exactly how a back-to-back binding works. Here are the results and I'm very excited to finally have a clear idea of how this book is going to look. My intention now is to use what is called a 'quarter-binding'. This means that I will be using book cloth on the spine and the rear with a printed image which will take up three-quarters of each of the covers. Don't worry ... It will all make sense very soon now!!! I have now ordered some gorgeous book cloth in various colours and one or two other lovely bookbinding goodies from these people http://store.falkiners.com/store/ Have a look at their website if you are at all interested in bookbinding and paper. They have some beautiful things and the service is excellent. Next step? Finalising the cover design ... It's a fact: I definitely have a fear of bookbinding. The fear arises from the other fact. Which is that I love bookbinding. And I love my bookbinding to be absolutely perfect. Which isn't easy. So, here I am, having spent a lot of time and investment selecting a beautiful paper and printing all the pages of my book at home, facing the task where it Could All Go Horribly Wrong. So I have made a 'dummy' book to practice on (That's it there in the foreground of the photograph)and have spent the morning trimming (with an extra sharp scalpel blade) and gluing the spine. I now have two mocked-up book blocks with which to trial-run a cover. In the background, clamped and glued, are 'The Real Things'. I have trimmed the spines on 'The Real Things' with an extra extra extra sharp scalpel blade, and it was still a very tricky and delicate manoeuvre which almost went badly wrong (I still have all my fingers, thankfully). I will now leave these to dry overnight. 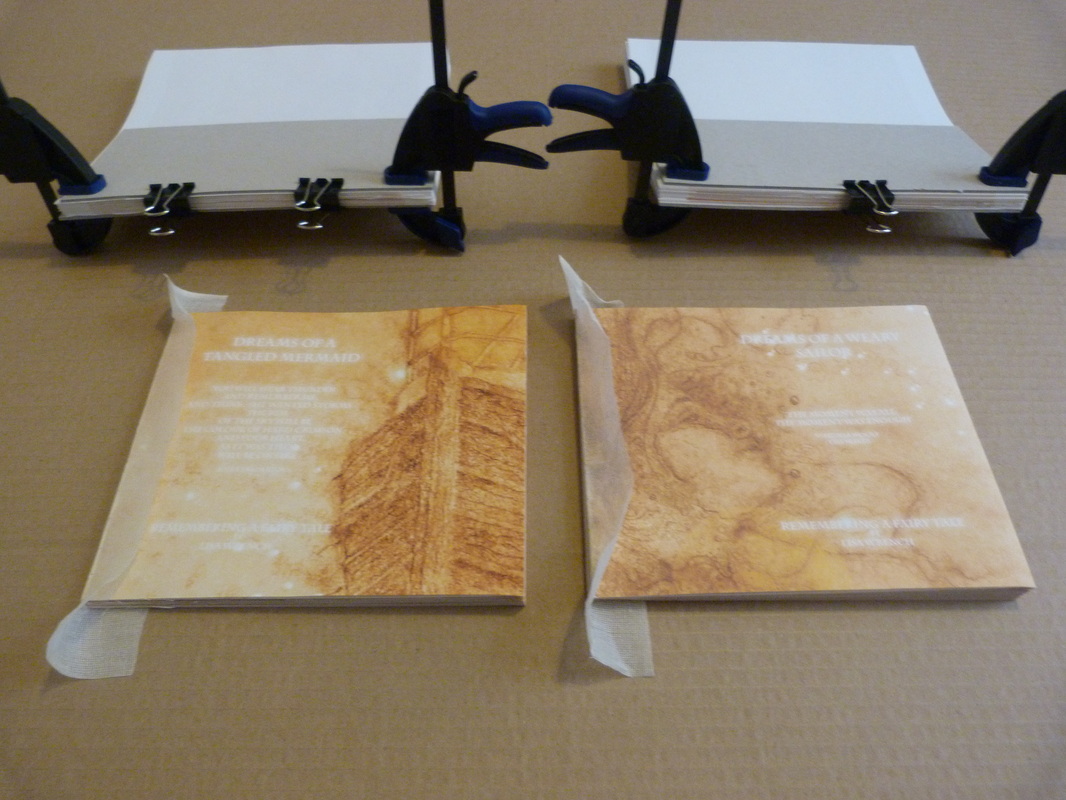 Because the book is french-folded, it has to be 'perfect-bound', which means the spine edges are all loose individual sheets which have to be glued and secured together. The binding needs to be extra strong to make sure it holds, and because my paper is quite heavy, I am employing a couple of tricks to make it super-strength. I found some tips on various kinds of binding, including perfect-bound, on this excellent website: http://www.transientbooks.com/process.html
I especially like the inclusion of thread embedded into the spine which I intend to use myself. Really can't wait to have this book finished now. With less than 1 month to go and a whole installation still to build, it will be nice to have all the 'sitting-at-my-desk' behind me, so I can get out there and have some fun with hammers and hacksaws (or whatever they're called) ... Ummmm ... Another steep learning curve coming up then ... ... I still have a book to finish ... I decided a while ago that I wanted complete autonomy over my book. This means that I have written, illustrated, designed and printed it all myself. The writing and the illustrating was straightforward enough. After all, as a writer and an illustrator it is what I do! When it came to designing, a 10 week course in Indesign gave me the technical ability, but learning the intricacies of graphic design was a little more tricky and fraught with bad decisions, mistakes, and dummy book after dummy book until I felt I had it right. I then went on to experiment with many different kinds of paper by running test prints on my Epson printer; again, many blind alleys and wasted ink until I achieved the look I wanted. In the end, I chose to print the book on Hahnenmuhle Photo-rag Book and Album, a lovely paper which gives an almost velvety texture to the prints and makes the colour of the images just sing. Here then are a few of the printed pages, waiting to be bound ... 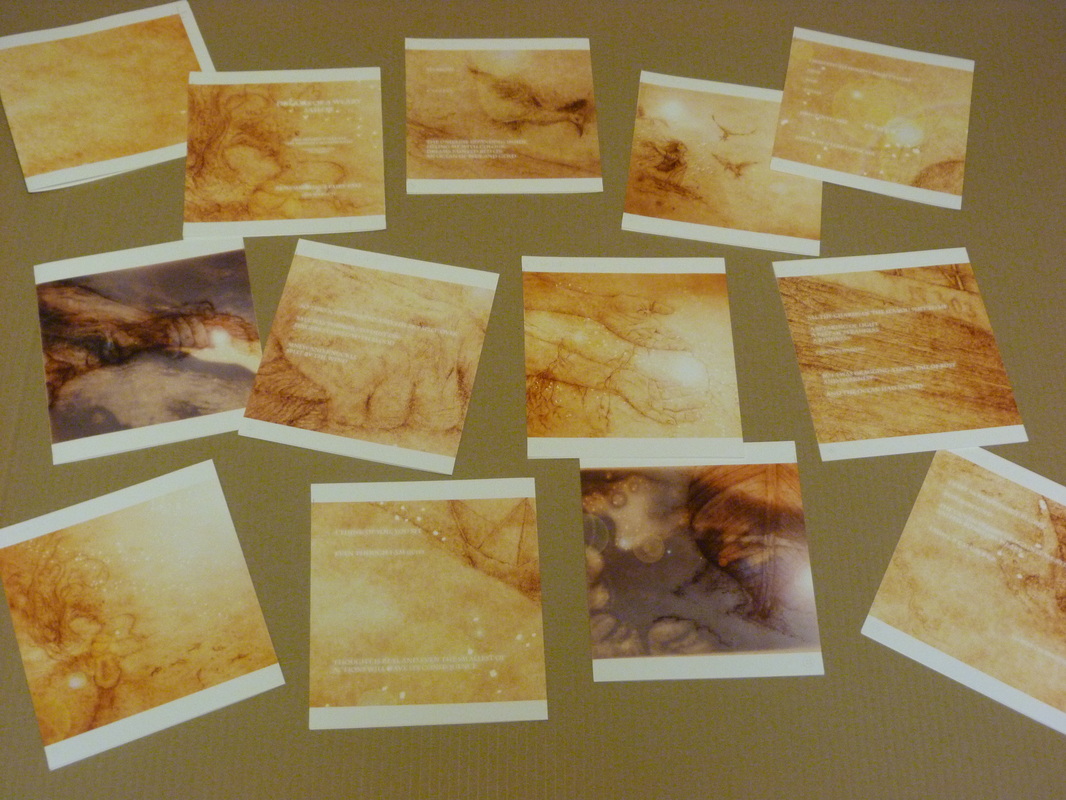 Printing the book at home was a fairly miserable job, I must admit, and I made a lot of mistakes along the way, but by doing everything myself I feel that I have learned some invaluable skills and given myself absolute control over my work, both now and for the future.
The next step then is to get these pages bound into 2 'book blocks' and from there I will be creating a hardback cover. Almost done! |

Lighting fires on the Summer Solstice at Whitsand Bay
I am a ...... Teller of Tales. A Creator of Books. An Artist, Illustrator and A Boatbuilder. A Professional Daydreamer, Occasional Mermaid, and always The Eternal Optimist. Categories
All
Archives
February 2019
|